Large Scale Central

Lionel Atlantic a blast from the past, rebuild and upgrade 2.0

This is a article I decided to share as Ive been going thru a FULL rebuild of my Lionel Atlantics. I will share what ive done to improve and make this loco a better performer. My goal here was to be able to reliably pull 4 heavyweights all day long with full lights, sound and puffing smoke. please feels free to add anything of use to the article that may enhance the rebuild. Nick

The rebuild begins with 3 units I found in my storage unit that I bought years ago. I will only start with one to make sure I can achieve what Im looking to do before committing to rebuild the others.

Timely! Timely! Timely. Looking forward to the rebuild Nick, as I just picked one of these up at a reasonable price. I’ve checked the other hints and tips I’ve found for it, and will add yours to the list.

Nick, if you are wanting to write an article for posterity that has a reasonable chance of not getting lost, it is best to do it here: http://www.largescalecentral.com/articles/

You can find it on the toolbar between Chat and Freight Sheds, just above here.

This forum is for discussing articles posted there.

I just thought you’d want to know. :smiley:

Steve Featherkile said:
Nick, if you are wanting to write an article for posterity that has a reasonable chance of not getting lost, it is best to do it here: http://www.largescalecentral.com/articles/

You can find it on the toolbar between Chat and Freight Sheds, just above here.

This forum is for discussing articles posted there.

I just thought you’d want to know. :smiley:


Thanks for the heads up Steve, I didn’t know that Article section existed, I thought this forum was were they got posted. Maybe Bob could move this whole thread to the Modeling section.

Nick

Keep it as an article Nick, otherwise it will get buried in the forums.

OK since I started it here can I finish it here then move it to they article section.?

You could, I suppose, but it would be a lot of unnecessary work.

OK, The 1st thing was to tair it apart and see what I was workin with, 2nd thing I needed to do was to paint the boiler and cab the way I wanted.

(http://freightsheds.largescalecentral.com/users/nicholas_savatgy/_forumfiles/Lionel442-1.JPG)

I cant stand all black steam loco, so as this version was all black it got the graphite paint treatment to the boiler and smoke box. All the chrome detail parts and hand rail will be painted with engine black. Bell and pop off valves will be painted brass color.

(http://freightsheds.largescalecentral.com/users/nicholas_savatgy/_forumfiles/Lionel442-2.JPG)

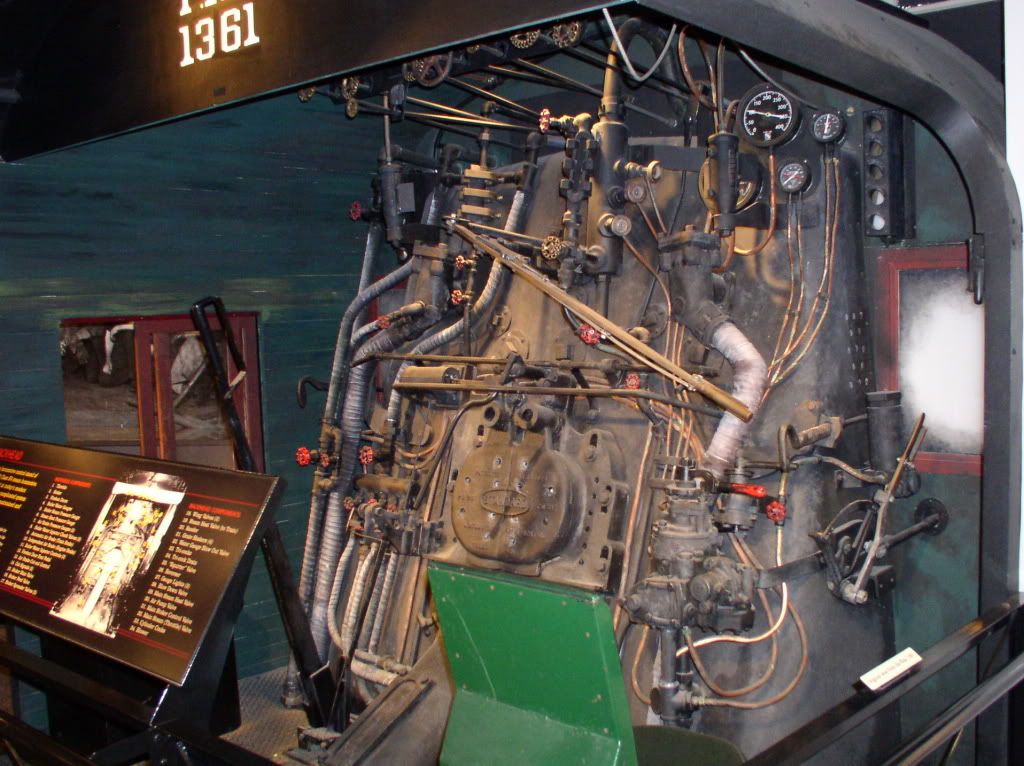
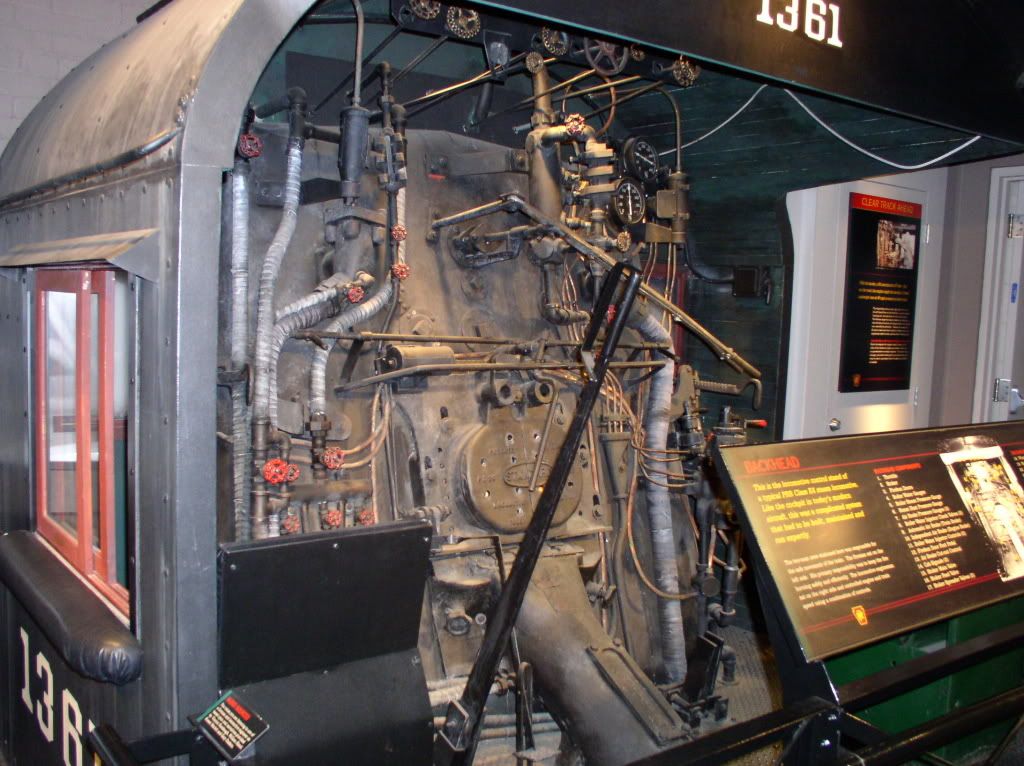
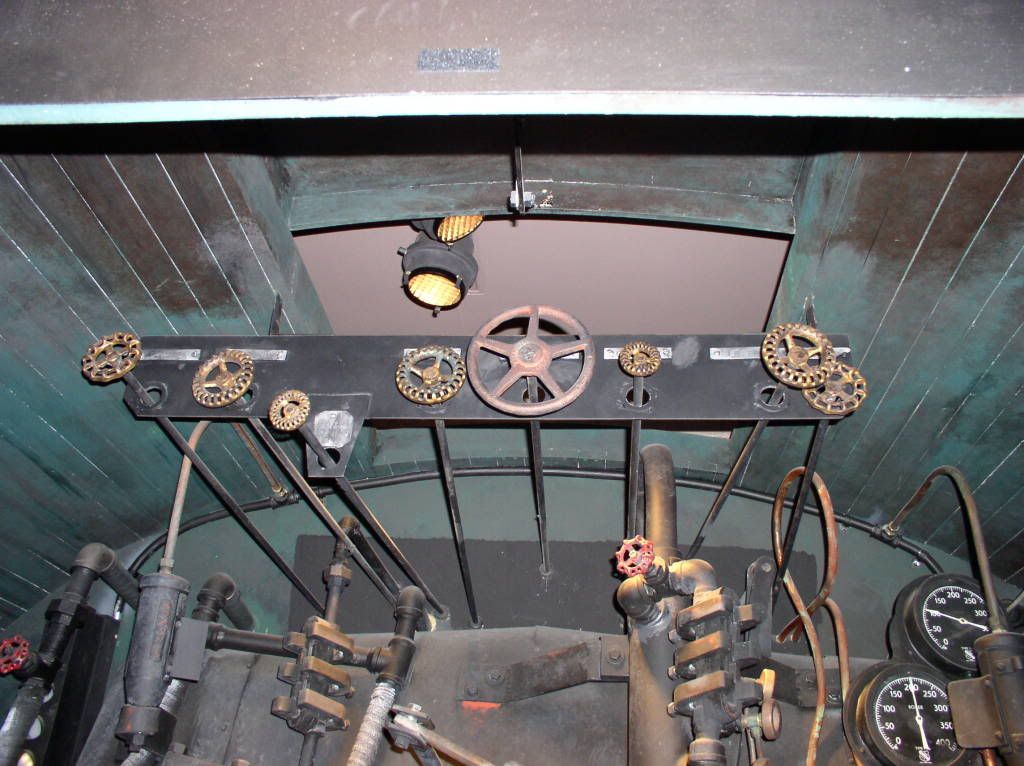
Next I set my sights on detailing the cab interior with a NYC green color and painted some of the back head details to make it look better once I install a cab light. With just these few paint modifications the engine looks much better and less Toy like.

(http://freightsheds.largescalecentral.com/users/nicholas_savatgy/_forumfiles/Lionel442-3.JPG)

(http://freightsheds.largescalecentral.com/users/nicholas_savatgy/_forumfiles/Lionel442-4.JPG)

Now with the cab mounted back on you can see it looks much better to the eye.

(http://freightsheds.largescalecentral.com/users/nicholas_savatgy/_forumfiles/Lionel442-5.JPG)

Next I moved on to installing the metal USA Trains smoke unit in the boiler, I plan on running a QSI or Zimo decoder with sound and cuffing smoke depending on which shows up at my door 1st. Smoke unit install went faily easy as all I need to do was fab up a few L brackets and screw it in. What nice about this smoke unit install is that the boiler has a plastic bulkhead just behind the stack and made the install pretty easy.

(http://freightsheds.largescalecentral.com/users/nicholas_savatgy/_forumfiles/Lionel442-6.JPG)

OK Thats it for now more to come soon. Nick

Very cool, and very timely, Nock, since we were just discussing these engines on that other thread… I hadn’t known that this model has such a fine rep - that’s good to know!
Your cab interior is a winner!
I agree with the others about making your build into an article, BTW…

John Le Forestier said:
Very cool, and very timely, Nock, since we were just discussing these engines on that other thread... I hadn't known that this model has such a fine rep - that's good to know! Your cab interior is a winner! I agree with the others about making your build into an article, BTW...
Nock ??????????? Listen John Ive been called a lot of things but never Nock...... he he he :)

OK, Back onto this, sorry very slow going as this is a very busy Show month for me but any ways. There are 2 weak points in the drive train, 1st the bottom cover has some gap when bolted to the motor block allowing the drivers to come out of quarter when lifted up. A lot of people try to shim this by gluing .015 styrene to the cover to keep the axles tight against the motor block thus eliminating the chance for the axle to drop and come out of quarter. Most of the time the shims come loose because the glue doesnt stick well to the plastic used to make the engine. I decided to use J B Weld epoxy by drilling a small pin hole in the cover were the axles ride with a drop of epoxy and bolting the cover back on and turning the loco upside down and letting it form around the axle and letting it dry, Thus making it the perfect size shim. I also soldered some heavy duty wire for the power pickups as the wire Lionel used is to small for me.

(http://freightsheds.largescalecentral.com/users/nicholas_savatgy/_forumfiles/lionel7.JPG)

The 2nd issue is the BIG heavy duty motor is mounted in the block with just a tie strip holding it in place, we need to add a couple more heavy dirty tie strips to the motor to make it really tight in the block. Believe it or not when this is done, the motor is in very tightly and cant move. Next I added about 2 pounds of no lead sick on wheel weights to the chassis for better pulling power, You could add more as the chassis is very heavy duty.

(http://freightsheds.largescalecentral.com/users/nicholas_savatgy/_forumfiles/lionel8.JPG)

More to come.

OK next onto the pilot truck and trailing truck wheels, Lionel put plastic wheels on these and i cant stand plastic so off they came. I called USA Trains and ordered a pr of Hudson metal pilot wheels and they fit rite on, also added a little weight to the pilot truck to keep it on the track better. You can see it in the center of the truck. I had a spare metal trailing truck wheels from a AML K-4 in my parts box and they fit, go figure. So now everything has metal wheels for added weight and better performance on track.

(http://freightsheds.largescalecentral.com/users/nicholas_savatgy/_forumfiles/Lionel9.JPG)

Nick, I realize I’m behind the curve on this one,and they are from a Pacific, but will these photos I took of the 1361 cab display at the Railroader’s Memorial Museum in Altoona do you any good on the others? I don’t think the cab layouts varied a whole lot by the superpower era.

(http://i397.photobucket.com/albums/pp52/steamnut1917/PC060004.jpg)

(http://i397.photobucket.com/albums/pp52/steamnut1917/PC060005.jpg)

(http://i397.photobucket.com/albums/pp52/steamnut1917/PC060006.jpg)

Thanks for the pictures Mik, You always seem to have some cool picture shots in your files, Now I need to find some different size hand
valves and add that, Thanks. back onto this project soon as things are starting g to calm down now.

Nick

OK Next is to wire up some new L.E.D.s for the fire box, cab, headlight and all marker lights. I used 3mm LEDs and a diode and a LED driver (cl2) for this, no resistors needed.

(http://freightsheds.largescalecentral.com/users/nicholas_savatgy/_forumfiles/lionel11.JPG)

(http://freightsheds.largescalecentral.com/users/nicholas_savatgy/_forumfiles/lionel10.JPG)

Finally I added a plug the the rear of the loco to bring extra power from the wheels on the tender, The finished loco back together and on the rollers.

(http://freightsheds.largescalecentral.com/users/nicholas_savatgy/_forumfiles/lionel12.JPG)

Looking good, Nick.

-Kevin.

Thanks Kevin, Next I was on to the tender, I added Ball bearing AML K-4 power pickup wheels to all the trucks for smooth operation and power pickup. I also added tender marker light LEDs and a back up light as well. The back up light housing was a extra housing I had gotten from Ram track lighting and I just drilled out the tender to fit it and painted it black.

(http://freightsheds.largescalecentral.com/users/nicholas_savatgy/_forumfiles/Lionel13.JPG)

(http://freightsheds.largescalecentral.com/users/nicholas_savatgy/_forumfiles/Lionel14.JPG)

(http://freightsheds.largescalecentral.com/users/nicholas_savatgy/_forumfiles/LIONEL15.JPG)

I like the work Nicholas

I can’t be certain from the picture, but it looks like a LED lens that allelectronics.com sells as well.

Jason, Yup same housing. So I finished up reassembly of the tender and loco, Painted most of the brass color parts like hand rails and stuff engine black. Wheels are done also just need to finish the drivers, I also repainted the engineer and fireman as I like the figures just didn’t care for the colors. Locomotive came out great and runs well, I will give her a full break in this weekend with some passenger cars in tow. And also a big thanks to Chuck I. As he sent me some spare parts I needed to finish the loco. Nick

(http://freightsheds.largescalecentral.com/users/nicholas_savatgy/_forumfiles/lionel1.JPG)

(http://freightsheds.largescalecentral.com/users/nicholas_savatgy/_forumfiles/lionel2.JPG)